 Sep, 30 2025
Athlete Abrasion Risk Assessment Tool
Assess Your Risk of Abrasions
Every athlete knows that a scrape or two is part of the game, but a painful abrasion can sideline you faster than a sprained ankle. The good news? Most abrasions are avoidable, and when they do happen, proper care can get you back on the field in no time. Below you’ll find a step‑by‑step plan that covers everything from the physics of skin damage to the best dressings for a quick, infection‑free heal.
- Understand what triggers abrasions during sport.
- Apply proven prevention tactics before you train.
- Master the first‑aid actions that stop bleeding and reduce pain.
- Select the right treatment product for each stage of healing.
- Follow recovery habits that prevent scarring and re‑injury.
What Triggers Abrasions in Sports?
In most cases, an abrasion is simply the skin’s outer layer being scraped off by friction. When a player slides across a rough surface, the combination of friction the resistance generated when two surfaces rub against each other and moisture creates a micro‑tear that can quickly widen into a painful scrape.
The skin barrier the outermost layer of epidermis that protects against pathogens and fluid loss is weakened when sweat or rain makes the skin more pliable, allowing the abrasive surface to rip through more easily. High‑intensity sports-rugby, soccer, basketball-expose athletes to repeated contact with the ground, equipment, or opponents, raising abrasion risk dramatically.
How to prevent abrasions Before They Happen
Prevention is all about reducing friction, protecting the skin barrier, and controlling moisture.
- Moisture‑wicking apparel: Choose jerseys, shorts, and socks made from engineered fibers that pull sweat away from the skin. The moisture-wicking apparel clothing designed to move sweat from the skin to the garment’s outer surface keeps the skin drier, decreasing the likelihood of friction‑induced tears.
- Skin preparation: Before training, clean the skin with a mild antiseptic and apply a thin layer of petroleum‑based lubricant or a sports‑grade barrier cream. This creates a slick surface that reduces friction.
- Protective taping: Use an athletic taping technique method of applying cohesive tape to support skin and joints on high‑risk areas like knees, elbows, and shins. Taping adds a sacrificial layer that absorbs the majority of the shear force.
- Equipment fit: Ensure that helmets, shin guards, and pads fit snugly but don’t chafe. Loose gear constantly rubs against the skin, creating hot spots that can turn into abrasions.
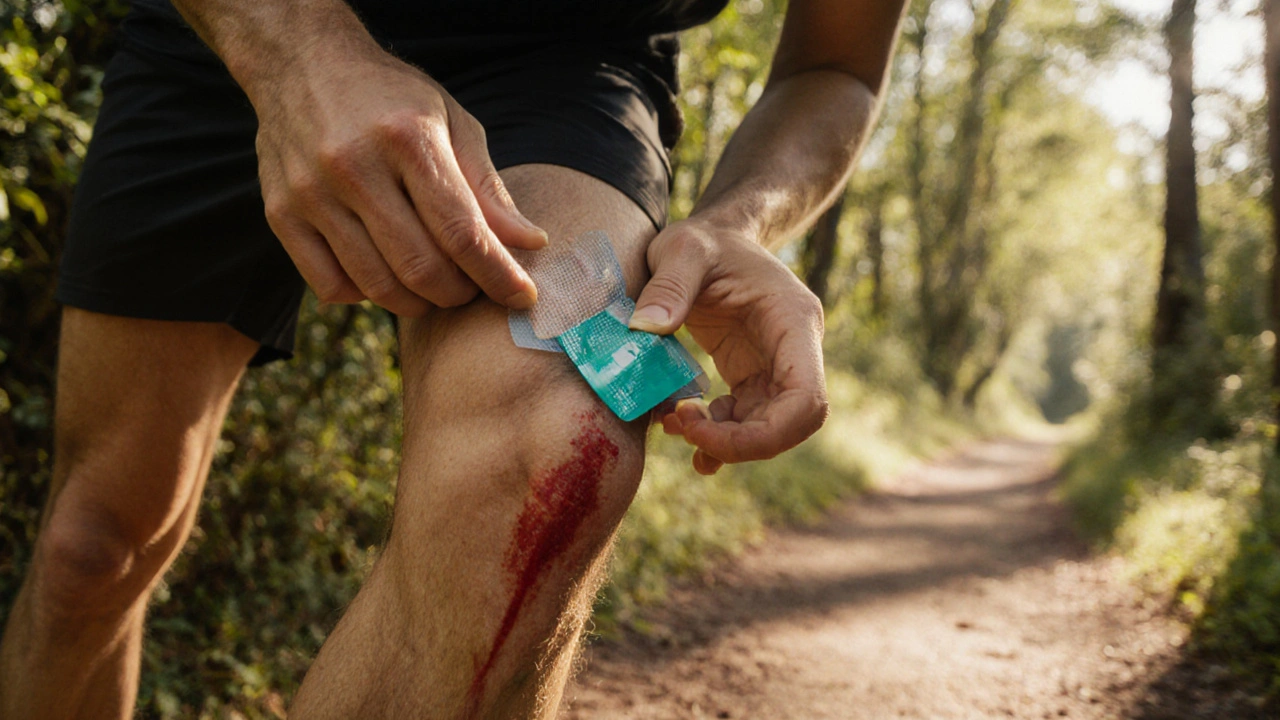
Immediate First‑Aid Steps When an Abrasion Occurs
Time is of the essence. Acting quickly limits bleeding, pain, and infection risk.
- Stop the bleeding: Apply gentle pressure with a clean, dry gauze pad from a well‑stocked first aid kit a portable collection of medical supplies for emergency care. Hold for 3-5 minutes.
- Rinse the wound: Use lukewarm tap water to flush out debris. Avoid scrubbing, which can damage healthy tissue.
- Disinfect: Apply an antimicrobial ointment a topical agent that reduces bacterial load and promotes healing such as bacitracin or a chlorhexidine based cream.
- Cover: Protect the abrasion with a suitable dressing (see next section).

Effective Treatment Options: Choosing the Right Dressing
Not all dressings are created equal. Selecting the right one depends on wound size, depth, and exposure to movement.
| Dressings | Best for | Key Benefits | Typical Costs (UK) |
|---|---|---|---|
| Hydrocolloid dressing | Medium‑size abrasions, low‑shear areas | Creates moist healing environment, self‑adhesive, lasts up to 7 days | £2‑£4 per piece |
| Silicone gel sheet | Post‑healing scar minimisation | Reduces hypertrophic scarring, flexible, can be reused | £5‑£8 per sheet |
| Antimicrobial ointment (e.g., bacitracin) | Fresh abrasions with high infection risk | Prevents bacterial growth, easy to apply | £1‑£2 per tube |
| Standard adhesive bandage | Small scrapes, low‑movement zones | Convenient, inexpensive, breathable | £0.50‑£1 per pack |
For a high‑impact sport like rugby, a hydrocolloid dressing a gel‑forming adhesive bandage that maintains a moist wound environment is often the best choice because it stays intact during vigorous movement and reduces the need for frequent changes.
After the initial healing phase (3‑5 days), switch to a silicone gel sheet a medical-grade silicone layer applied to the scar to soften and flatten it if you notice raised tissue. This helps avoid permanent scar tissue that could impair flexibility.
Recovery and Return‑to‑Play Tips
Even after the wound looks closed, the underlying skin is still rebuilding collagen. Follow these habits to protect the area while you train:
- Gradual loading: Re‑introduce the affected body part with low‑impact drills before returning to full contact.
- Hydration and nutrition: Adequate protein (1.6‑2.2g/kg body weight) and vitaminC boost collagen synthesis.
- Sun protection: UV exposure can darken fresh scars. Apply a broad‑spectrum SPF30 sunscreen once the dressing is removed.
- Re‑apply barrier cream: Once the skin has re‑epithelialized, continue using a thin layer of barrier cream during training to keep the new skin resilient.
Common Mistakes to Avoid
Even seasoned athletes slip up. Here are pitfalls that turn a minor abrasion into a lingering problem:
- Using cotton gauze as a long‑term dressing - it sticks to the wound and pulls off new tissue.
- Skipping the cleaning step - dirt left in the wound is a breeding ground for infection.
- Applying ointments on heavily exuding wounds - this can trap moisture and cause maceration.
- Neglecting scar care - early silicone therapy prevents hypertrophic scarring.
Frequently Asked Questions
How long should I keep a hydrocolloid dressing on?
Leave it in place for up to 7 days unless it lifts, becomes overly saturated, or shows signs of infection. The dressing creates a sealed, moist environment that speeds up healing.
Can I wash the abrasion with soap?
Yes, but use a mild, fragrance‑free soap and rinse gently. Harsh detergents can irritate the wound and delay closure.
When should I see a doctor for an abrasion?
Seek medical attention if the wound is larger than a 5cm circle, shows increasing redness, swelling, pus, or if you have a tetanus shot that’s more than 10years old.
Is it okay to keep playing with a minor abrasion?
For very small scrapes that are properly covered, you can usually continue. However, assess pain and bleeding; if either worsens, stop and treat immediately.
What’s the best way to reduce scarring?
Keep the wound moist, protect it from sunlight, and apply a silicone gel sheet once the skin has closed. Consistent use for 8‑12 weeks yields the smoothest result.
Johnson Elijah
September 30, 2025 AT 14:23Hey team, 🌟 let’s talk about that barrier cream you slap on before a hard‑court session. It’s not just a gimmick – it creates a slick surface that actually cuts down friction dramatically. I’ve seen players who skip it end up with nasty scrapes that could have been avoided. So, dab a thin layer on any high‑risk spots – knees, elbows, shins – and you’ll thank yourself later. Remember, a little prep now saves a lot of pain later! 🙌
christopher werner
September 30, 2025 AT 18:33I appreciate the thorough guide; the steps are clear and respectful of the athlete’s routine. Keeping the language simple helps everyone follow along without feeling overwhelmed.
Travis Evans
September 30, 2025 AT 22:43Yo, as a coach I always tell my squad: treat that skin like you’d treat your equipment – keep it clean, keep it covered, keep it moving. A quick rinse, a dab of antimicrobial ointment, then slap on a hydrocolloid if the scrape is bigger than a paper cut. Trust me, those colorful nicknames for the dressings (like “gel‑forming superheroes”) aren’t just for fun – they actually seal the wound and let it heal faster while you keep training.
Jessica Hakizimana
October 1, 2025 AT 02:53Every athlete knows the sting of a fresh abrasion, but the true battle is fought in the minutes after the scrape appears. Think of the skin as a living membrane that, once breached, loses its barrier function and invites infection like an open door invites the wind. By cleaning with lukewarm water and a gentle, fragrance‑free soap, we remove the grime without stripping the surrounding healthy tissue. Applying a thin coat of antimicrobial ointment after cleaning not only reduces bacterial load but also maintains a moist environment that encourages epithelial migration.
Moisture‑wicking apparel plays a subtle yet crucial role; when sweat is pulled away from the skin, the friction coefficient drops, meaning less shear force on any vulnerable spot. Pairing that with a well‑fitted pad or taping technique adds a sacrificial layer, further dispersing the mechanical stress of contact.
Now, let’s talk healing phases. In the first 24‑48 hours, the priority is hemostasis – gentle pressure and a breathable dressing keep the clot stable. From day three onward, a hydrocolloid dressing can stay in place for up to a week, offering a conducive moist wound milieu that speeds granulation.
After the wound closes, the battle shifts to scar management. Silicone gel sheets, applied daily for 8‑12 weeks, flatten raised tissue and improve texture. Sunscreen becomes your unexpected ally; UV radiation can hyper‑pigment the new skin, making the scar more noticeable.
Nutrition matters too. Adequate protein supports collagen synthesis, while vitamin C acts as a cofactor for cross‑linking, yielding stronger, more resilient tissue. Hydration maintains skin elasticity, making it less prone to tearing under stress.
Finally, mental outlook matters. An optimistic mindset reduces stress hormones that can impair healing. Embrace each step, monitor for signs of infection, and trust the process – the scar will fade, and you’ll be back on the field stronger than before.
Keyla Garcia
October 1, 2025 AT 07:03Wow, reading this felt like watching a drama unfold on the field – the tension, the stakes, the glorious comeback! 🎭 If you ignore the basics, you’ll be starring in “The Legend of the Unhealed Abrasion”. Trust me, nobody wants that role.
Ismaeel Ishaaq
October 1, 2025 AT 11:13Alright, let’s get aggressive about this! The moment you step onto the turf without a proper barrier, you’re practically handing the opponent a free pass to skin‑damage territory. I’m not just saying “use a cream” – I’m demanding you *strategize* like a chess master: evaluate the friction, apply the slick, then dominate the game. Don’t be the player who learns the hard way that a missing taping session costs you weeks of training. Own your skin, own the match! 💪
Jesse Goodman
October 1, 2025 AT 15:23Clean, cover, repeat. 🌀
Antara Kumar
October 1, 2025 AT 19:33While the guide is solid, I must point out that embracing Western skin‑care standards without considering local climate nuances can be counterproductive. For instance, athletes training in tropical humidity might find barrier creams insufficient; instead, a breathable yet protective polymer spray works better. It’s essential to adapt, not just adopt.
John Barton
October 1, 2025 AT 23:43Oh, look, another “essential guide” that tells us to put cream on our skin. Because that’s never been done before, right? 🙄 If I wanted a lecture on basics, I’d watch a kindergarten teacher. Just slap a band‑aid and move on.
Kimberly :)
October 2, 2025 AT 03:53Interesting take, but I’m not entirely convinced. While the advice is comprehensive, the recommendation to use hydrocolloid dressings for up to seven days could be problematic for athletes who need frequent gear changes. A more flexible, quick‑change option might be preferable.
Sebastian Miles
October 2, 2025 AT 08:03From a performance perspective, the friction‑reduction tip aligns with the concept of ‘low‑drag wearables’ we see in elite cycling. In practice, swapping to moisture‑wicking fabrics can shave off milliseconds in sprint events – marginal gains that add up.
Harshal Sanghavi
October 2, 2025 AT 12:13Sure, the guide is helpful, but let’s be real – most players just ignore the extra steps because they’re too busy “getting good”. If you want compliance, make the routine as simple as possible – a spray‑on barrier and you’re set. Anything more is just extra fluff.
Duke Gavrilovic
October 2, 2025 AT 16:23Greetings! Your article is both thorough and accessible – a commendable blend of technical detail and layman‑friendly language. I especially appreciate the cultural note on sunscreen usage, reminding global athletes of regional UV variations.
Abby VanSickle
October 2, 2025 AT 20:33Thank you for the comprehensive overview. I would add that for athletes with a history of hypertrophic scarring, early intervention with silicone gel sheeting should be initiated as soon as re‑epithelialization is confirmed, ideally within 48‑72 hours.
chris macdaddy
October 3, 2025 AT 00:43Hey friends, great guide! Just a tip – when you’re cleaning a big scrape, use a sterile saline solution if you have it; it’s gentler than straight tap water and helps prevent sting.
Melissa Jansson
October 3, 2025 AT 04:53Honestly, this reads like a corporate whitepaper. Where’s the drama of a real life “scrape‑to‑victory” story? Give us a gritty anecdote, not just tables of dressings. 🎭
Max Rogers
October 3, 2025 AT 09:03This is solid advice. Just a quick reminder: always check that the adhesive on dressings isn’t causing extra irritation on sensitive skin.
Zane Nelson
October 3, 2025 AT 13:13The content is adequately researched, though the prose suffers from an over‑reliance on buzzwords. A more nuanced discussion of pathophysiology would elevate the piece.
Sahithi Bhasyam
October 3, 2025 AT 17:23Excellent write‑up!; however, I’d suggest adding a quick‑reference infographic; it would help visual learners-like me-quickly grasp the steps; thanks! 😊
mike putty
October 3, 2025 AT 21:33Solid guide-just remember to stay positive and keep your skin happy; that’s the best way to stay in the game.